Before I started editing, I made folders to put my footage in so when i uploaded them from onedrive to my USB stick, they were all organised in folders. I named my files based off what console the game footage was from. This would make it easy when I was making each chapter as the footage would correspond to a console era. That way it made it easy to find my footage.
I made the folders in one drive and in my USB stick. That way i wasn't getting my footage mixed up and not knowing what was what. This was during the early stages of editing so the more footage I get, The more folders Ill make.
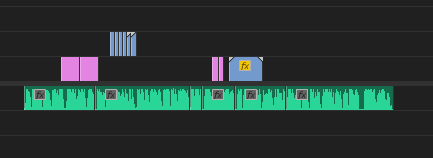
I am using this as an example as the Super Nintendo (SNES) was the console i got all the footage first. So as you can see there is alot of clips, So I thought it would be easier during the editing process to name each file based on what shot type it was and what game it was. That way I knew what shots to use and how to synchronise and mix up the shot types to switch between each other in the final product
To do the voice recordings for my scripts, I used an app for my phone called voice memos. This allowed me to voice record my script by saying it into my phone.
From the app I could use this to then save my voice recordings of my script and from my phone, upload it to onedrive so i could then save it from one drive on the computer to the USB stick plugged into the computer by dragging the files. From here I could edit it in Premier Pro. When making the voice recordings, I decided to only work on a chapter of the script at a time. Once i Recorded a chapter of the script and I was happy with it, I then edited the planned footage to go along with it. The reason I only worked on a chapter at a time is because i didnt want to wait until the end of production to start editing as i thought things would get confusing as I would have hundreds of clips that i Dont know where they go and it would get complicated. To make things easier I only worked on a chapter at a time.

I started the editing process by inserting the Audio for the intro to the script. After this i begun to gather assets to use accordingly to the footage. This would mainly be footage of modern day games as well as still images of old consoles and archive footage of older gameplay as i don't have the consoles to play them on.

Next, I took all my assets i Took from filming and synced and layered them over my commentary. This was a mix of images and videos of me playing games from a variety of different shots. I got some screen recorded gameplay of one of the most modern games, Zelda Breath of the Wild Which shows high quality gameplay and graphics. I got this from a screen recorded shot, then cut it to an Over the Shoulder shot. I do this to show how good games are today but then transition it to the start of gameplay back to the arcade games and some of the first few consoles. This is to show that it never always looked like this and started off very basic compared to today. I also started to add some of the footage for the montage but i haven't yet finished it yet as I don't have footage from the later consoles so im going to keep coming back to add to it as I Keep getting footage later on. So for now I have just left space of where I am going to include the other bits of footage and finish it towards the end. One Big problem I encountered which set me back and cost me time, Is that I recorded some footage in 4K but little did i Realise that it would cause an error in the computer in Premier Pro and cause the footage to go all glitched in the editing software. So to resolve this issue I had to render all the clips that went glitched and they went back to normal. that was a life saver as i would of had to retake all those shots which would of put me way behind filming schedule.
Now I started to work on The First chapter of the documentary. I started off by inserting the voice recording and begun to overlay archive images and videos form arcades in the 80's. This showed images of the consoles, Arcade machines and games. Some of the gameplay I got myself and some is archive footage i found online. Most of this is just archive footage and images online and i didn't have the consoles at the time. Although this doesn't demonstrate my mis en scene and different shot types used, I will start to include my own footage later on as in the following chapters I got my own footage with the games consoles I own.

After working for an hour and a half, I had pretty much completed the first chapter. Once its all done I may double check it to add certain transitions and what not later but as of now, I a, happy with how this section looks. Since it is off the arcade era in gaming and I don't have access to those consoles, this is mostly archive footage which I found online, but it still fits in with the documentary criteria however as it is common for documentaries to include archive footage. I also included some of my own footage of screen recorded gameplay as some of the arcade games have been brought to the Nintendo switch so screen recorded from there and sent it across to my phone wirelessly by scanning a barcode on the Nintendo switch screen in which the video would transfer over to my phone. I also used the Razor tool in order to cut out parts of the voice recording for the script in which I had stuttered, said something wrong, or stopped for a moment to think and take my time between paragraphs. as seen previously, that was what I did first. I added one of my dads interview questions at the start when talking about his first video game console as I thought this best fits in with this segment of the documentary. I gathered archive footage of young people playing arcade games when talking about the arcade games. I also gathered images of the arcade machines to show up close what they looked like. The images for the Pac Man, and donkey kong machines were my own images as I went to a retro video game convention a few years ago in which I was able to play on these arcade machines. as you can see I am leaving a gap in premier pro between chapters so I can clearly see what section is what incase I need to make changes at the end. Once the documentary is done, I will put them together.

Next, I begun working on the third segment, moving into the early 80's and talking about the Super Nintendo. After making the script for this section I started to gather footage I thought I would need. I took shots of me playing on the ones. I thought it would be cool if I took shots from different angles and synchronise them so that something I try to achieve here while I talk about the games and I think its going to work out pretty well. I had to retake some shots a few days later so I make sure to get and wear the same clothes for continuity to make sure it looks like it happened within the same day when you watch it.
Like the previous sections, I use the razor tool to cut out sections in the script recording where I stutter or say something wrong so it seamlessly flows together. Unlike the previous chapter, here I gathered a lot more of my own footage so I make sure to show loads of different camera angles. I use my footage to overlay my voice to show gameplay over commentary. I think the use of multiple camera angles makes it look more entertaining as initially I tried it with just the one and it doesn't look interesting or excite me as your just looking at one still shot. I also overlay my dad playing some games when he is talking about the SNES in his interview segment for a few seconds so the young audience gets an idea on what it looked like for him back then as it educates them what it was like for a young person to play on the Super Nintendo back in the 80's. Next, I am going to add the remaining footage for the rest of the audio.
After about another hours worth of work, I had finished the Super Nintendo segment. Unlike the other segment where I didn't have any of my own footage, For this bit, I was able to use most of my own footage as I have the console so therefore I was able to show gameplay of my using it. I used multiple different camera angles such as a side shot, close up of the screen, a zoomed out angle were you can see the screen and what around the screen such as things on the desk and the console. This works best as you can see what's in the background which adds some decoration to the shot. I also break up my voice recordings with my Dads interview questions. this is really good as it is relevant to what I am talking about at the time and splits up me talking about the facts and statistics by showing another young persons perspectives from playing games at the time. also I make sure to feature multiple different games in order to intrigue my audience, this will help entertain them which is apart of the client (the BBC's) three principles. And by talking facts and statistics I will be educating my audience which is something the BBC like to do in their shows for young adults. Using multiple camera angles and synchronising them so they switch is good as it makes it more entertaining rather than using just the one camera angle. I found the most challenging bit was to synchronise the gameplay so when the camera angle switches, the gameplay switches from the exact same point the previous one left off. To make this easier, I made longer clips during the recording and production so I had a bit more freedom of where I could cut the clip when editing.
I left a gap between the last chapter and this one incase I needed to add something at the very end, also this gave me space to organise my assets during editing when I do this part. It makes things easier too move clips around without it getting in the way of the already edited stuff. Now I did get ahead of myself with the editing process and was meant to add to the post production log a bit sooner than here. But basically I start off by adding my dads interview which will help separate the end of the last section as its gonna fade out from talking about the Super Nintendo by introducing the release of the Nintendo 64, then cut to this before I start talking about the facts of the Nintendo 64. It just helps structure the documentary so each era is blending together and it helps the audience who aren't familiar with each era, to clearly show when one segment ends and when a new one begins and introducing a new era. Im not fully finished editing this part as there's a few clips missing, however its mostly finished. I have my script edited and cut out the parts where I stutter and say things wrong so its very fluid and clear. also the clips I put in so far line up and make sense to what I'm saying. the camera angles cut and the gameplay continues from where the other camera angle left off. Obviously I only used one camera so to help each shot continue, when filming, I had to make sure to do the same things in the same way when recording the gameplay. Also, this time when I am doing interviews of my dad talking about his experience with the Nintendo 64 as a youth, I was initially going to include gameplay footage of me using it, but then I thought it would look more realistic if I got him to use it. So I got my dad to play some games on the Nintendo 64 and inserted it over him talking about his experience. That way while he talks about it, it looks more like a flashback as he is playing while he talks. I try to achieve this flashback affect by having a fade in transition when it shows the gameplay. Towards the end, I talk about the play station 1, however I don't have this console, so I use some archive footage from an old advert to show what the console looks like.

I am now starting to edit my gamecube chapter. This section has a heavy focus on how Nintendo made the gamecube in order to satisfy their young audience. They looked at that young people liked from their previous consoles, other company consoles, as well as other user requests to create something young people will enjoy and remember for the future. This shows hoe they added LAN compatibility so young people can go to their friends houses with a linking cable to link their consoles together, and play on their own TV and consoles,while being in the same room within the same game in order. At the start i talk about the technological aspects of the console and that they made it have better graphics to appeal to more young people, i then have it cut to me playing The Legend of Zelda Windwaker as that is one of the gamecube games that makes use of the enhanced graphics on this console. I make sure to try to synchronise the hots and gameplay between the cuts id different camera angles. I use a side shot, OTS shot, medium and close up shots while showing the gameplay. When i say medium shot, so i am meaning the shot where it shows the TV and the desk in the shot. this is to show a closer perspective than the side and OTS shot, but not having me in the shot. I use the medium shot to give the audience a first person perspective from my eyes of what I am seeing when I'm sitting down. I like to constantly cut between the camera angles as i think it helps make it more entertaining for the audience rather than showing the same camera angle for a minute. next I will start to edit the part where I talk about LAN parties and show gameplay of Mariokart double dash.

I edited for another 30-40 minutes and then had completed the gamecube segment of this video game documentary. The footage itself wasn't too tough to get, I used similar shot types as with the previous sections, `I then also synchronised the gameplay so the gameplay is fluid and continues to show the continuity of this documentary, To achieve this, I had to replay a similar part of each game multiple times across different angles. For the second half of this chapter when I talk about the LAN parties with the Gamecube, I understandably didn't have multiple consoles and multiple copies of the games to show off this feature. So as a result I found some archive footage of LAN parties of back in the early 2000's when the console came out. This archive footage is in lower quality so therefore the audience will be able to tell its old footage. For parts where I show the 8 GameCubes that is a still image but blends in with my own footage so you might not be able to tell it is from the internet. I mixed up the LAN party footage up with some of my own footage so it cuts from a quick look at what it looks like back then in poor camera quality, but then cuts to a high quality HD shot of me playing Mariokart to show a more clear look at the game I'm talking about. Also the higher quality shots will look more visually appealing to the younger audience and will interest them more. For the LAN party archive footage, I make sure to look for footage with young teens and adults playing so it matches the brief of how technology affects young people and also influences the young audience more if they see someone their age playing the games. As one more editing detail, I thought id add a transition going too and from the archive footage to show the audience a jump in time between the old and modern shots.
I then went throught the process of editing the same thing the same way but with my Wii footage and brought the documentary together with a conclusion talking about how technology started and how far its come to today. I talked about how the mobile phone and computer technology has helped this to happen while showing past and present gameplay. I then included screen recordings from twitter and google to how how the internet has helped this.
Once I edited the last segment of the documentary, I then rewatched every chapter of the documentary one last time to double check everything I included flowed and made sense and made sure there was no gaps or clips missing. Once I was happy with how everything looked, I then edited everything together by highlighting all the assets in one segment and joining it to the next one. I put every segment together so it made the completed product. For one last time I then did another check by watching it through to make sure it was perfect ad nothing went wrong. Once it was all done, I then rendered and exported the video. This bit was annoying as it took along time with it being a bigger video file than previous projects.
To finish I had to upload it to YouTube. The problem was when I uploaded it, it wouldn't let me as YouTube doesn't let you upload videos longer than 15 minutes, and my documentary was 39 seconds over that. To work around this issue, I had to verifying my channel by sending and entering a 6 digit verification code so I could then verify my channel and upload videos longer than 15 minutes.
Software and tools used
To record the voice recordings, I used voice memos which I showed earlier which allowed ,me to voice record my script so I could use it in my documentary. The postitives of using this software is I could go on and reset things and takes breaks in the same recording as I could then easily just edit it in premier pro once I was done. To get it to premier pro all I had to do was upload it to one drive and to keep things organised, I created a folder just for my script recordings so I knew where they were.
To edit my videos, I used premier pro. the razor tool became quite useful as it allowed me to precisely edit out parts of the recordings and audio. By right clicking on the end of my clip it allowed me to add fade transitions. I only used this if there was a change In scene or chapter as in a documentary they only use a transition in a change in scene so I thought I would replicate this. Anytime I wanted any text on screen, I used the text tool. Using this I could add some facts on screen to give certain parts some explanation and context. Using this I could also change the size and font o match it to them theme of that part of the documentary to keep everything appropriate and themed.


Comments
Post a Comment